
In Photoshop history brush tool is an underrated tool that very few people use. But I request you to read the complete article to better understand how to use the History Brush Tool.
What is History Brush Tool
The History Brush Tool is a brush-tool to retain the pixels of the earlier history state to the current state, which regains the previous pixels on the current layer by drawing on the photo with the brush.
What you can do with this tool
Imagine that, you had been restricted to work on a single layer without unlocking the background layer, and then you color graded/filtered an image which you are working on, but you want to remove the filter on some of the areas. This might become difficult for you because you don’t have any backup layer underneath the current layer, nor any clipping mask to redraw the previous pixels. In this condition, you can make use of the History Brush Tool.
And it doesn’t mean that you cannot use it on multiple layers, you can make use of this tool while working on multiple layers. But in general, the History Brush tool is best for those who want to work on a single layer.
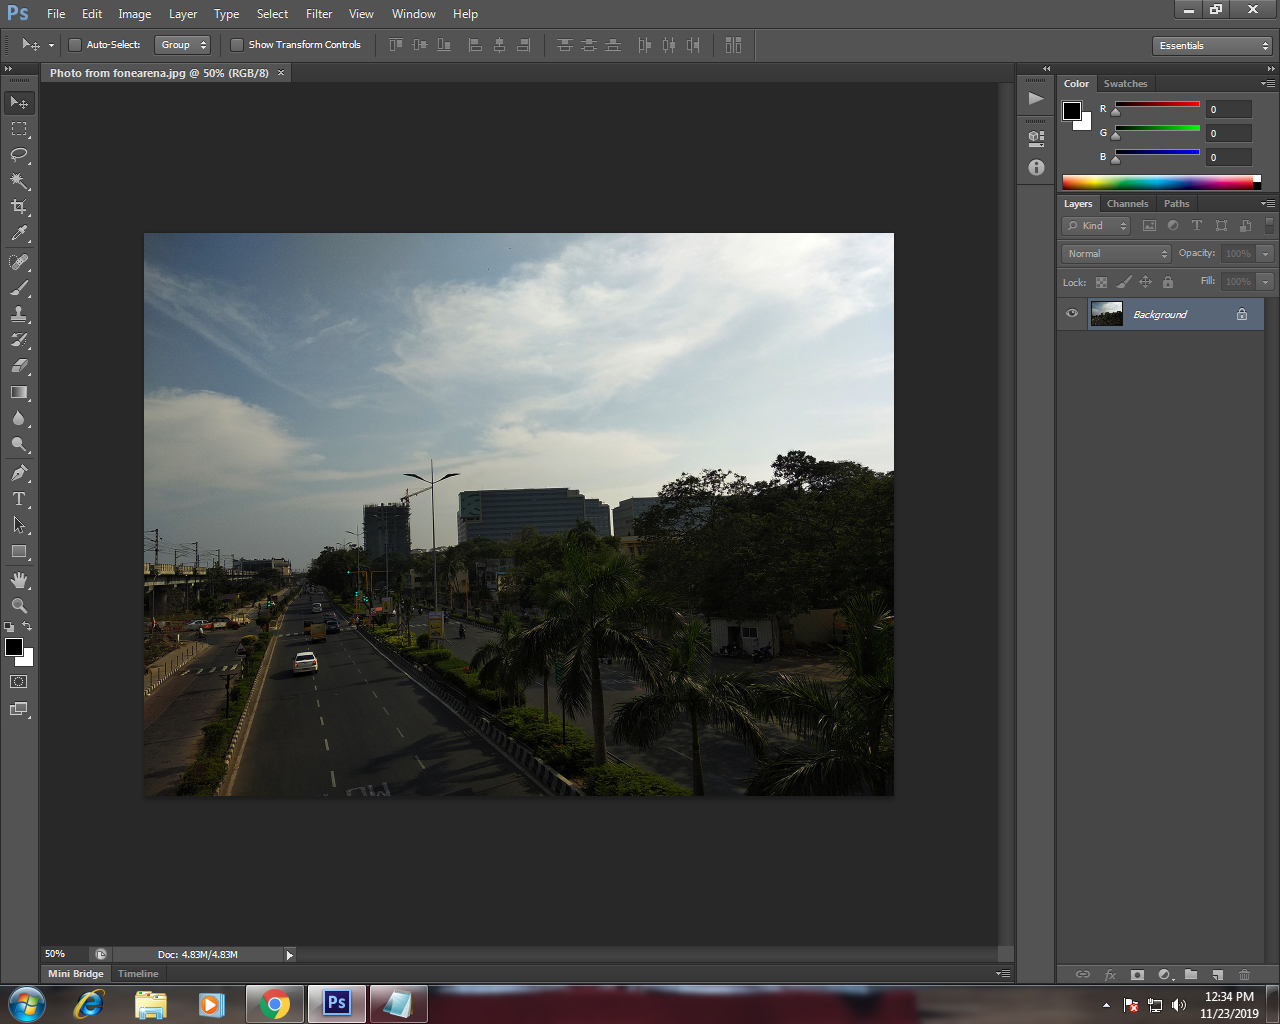
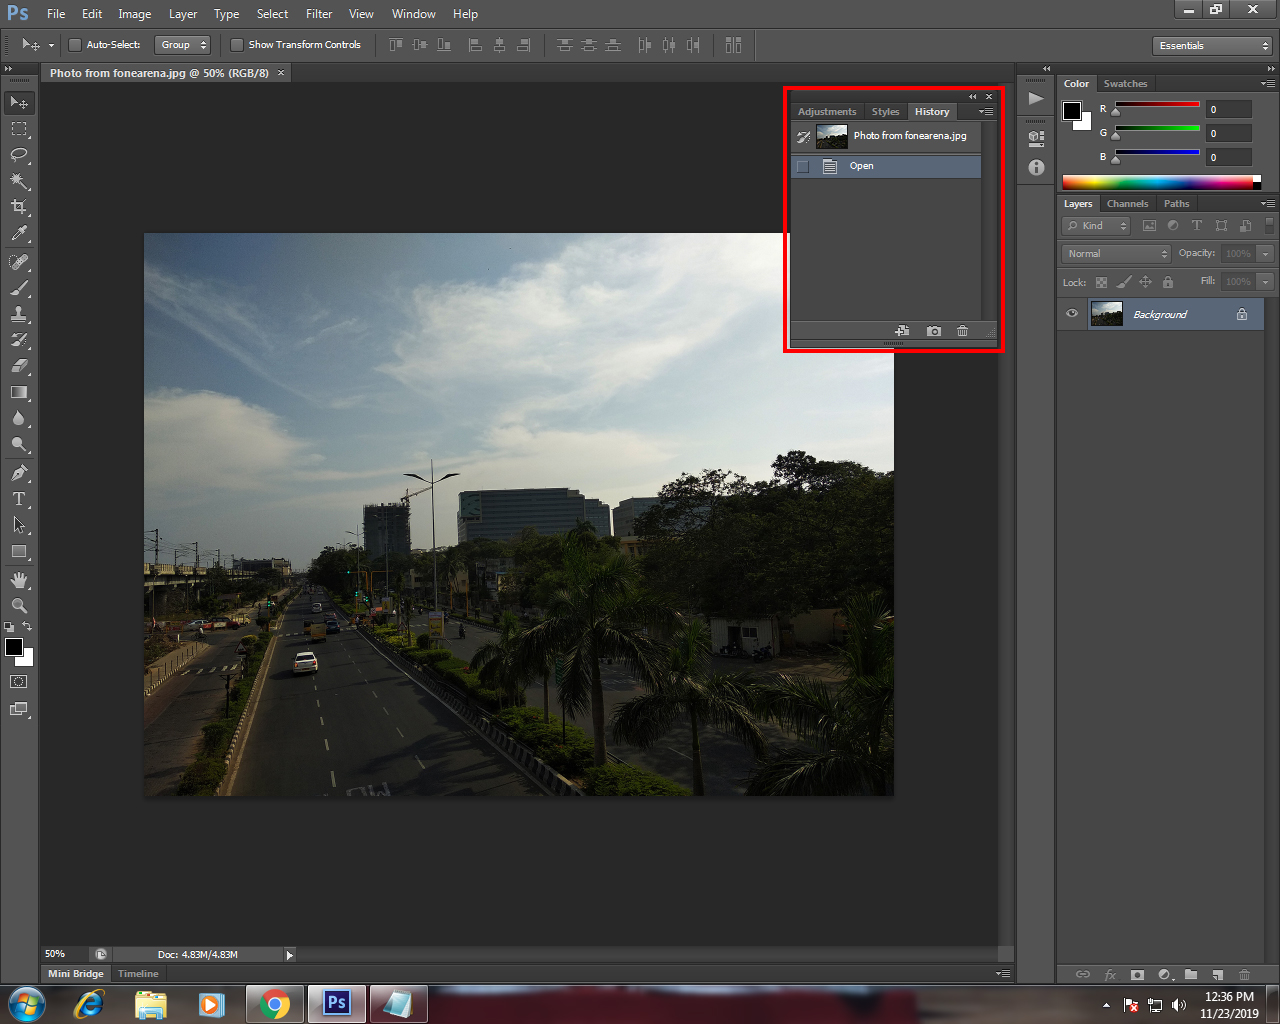
Open Photoshop, and take a look at the History Window. This is the history window in which your previous states/activities are displayed, which means, it shows the things/changes that you made to the photo.
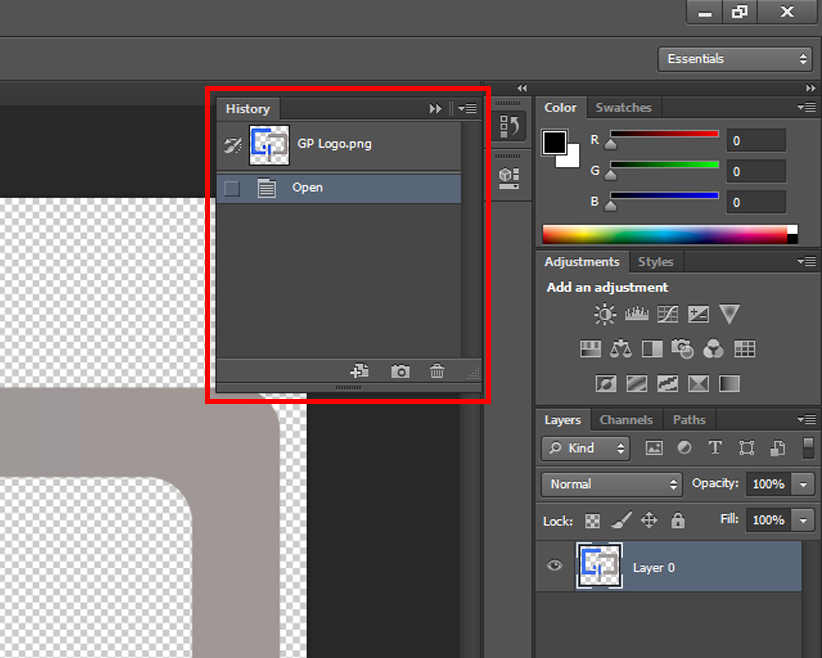
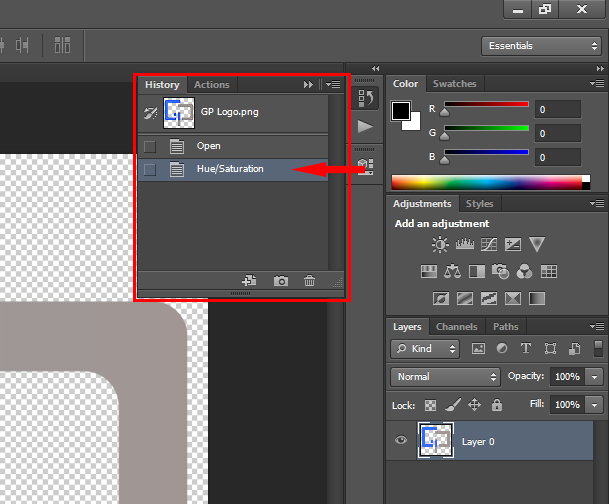
The history window is just like a time machine, where you can take your photo to the past state. For better understanding, compare both above and below images, In the above image, it is displaying the first state as Open which is the state when I opened the photo, in the below one, the Hue/Saturation added, that’s because just now I changed the saturation of the photo.
How to Enable History Window
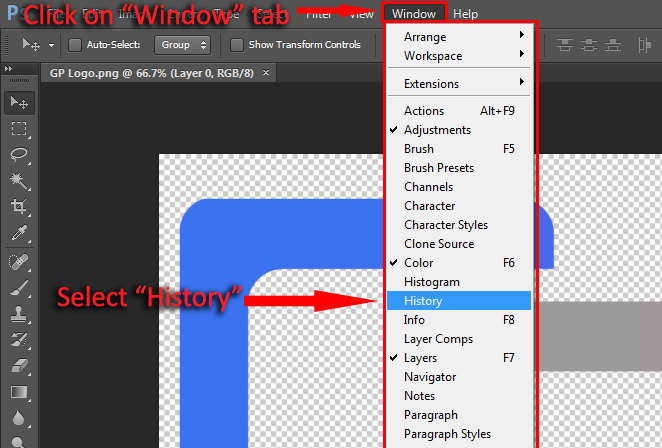
If You didn’t find any History window on the right side of the screen, then you have to make it visible from the “Window” tab. Click on the “Window” tab which is on top of the photoshop, and a drop-down menu will appear then Select History(This will make the History Window Appear on your workspace).
Here is the side-by-side comparison of the History states
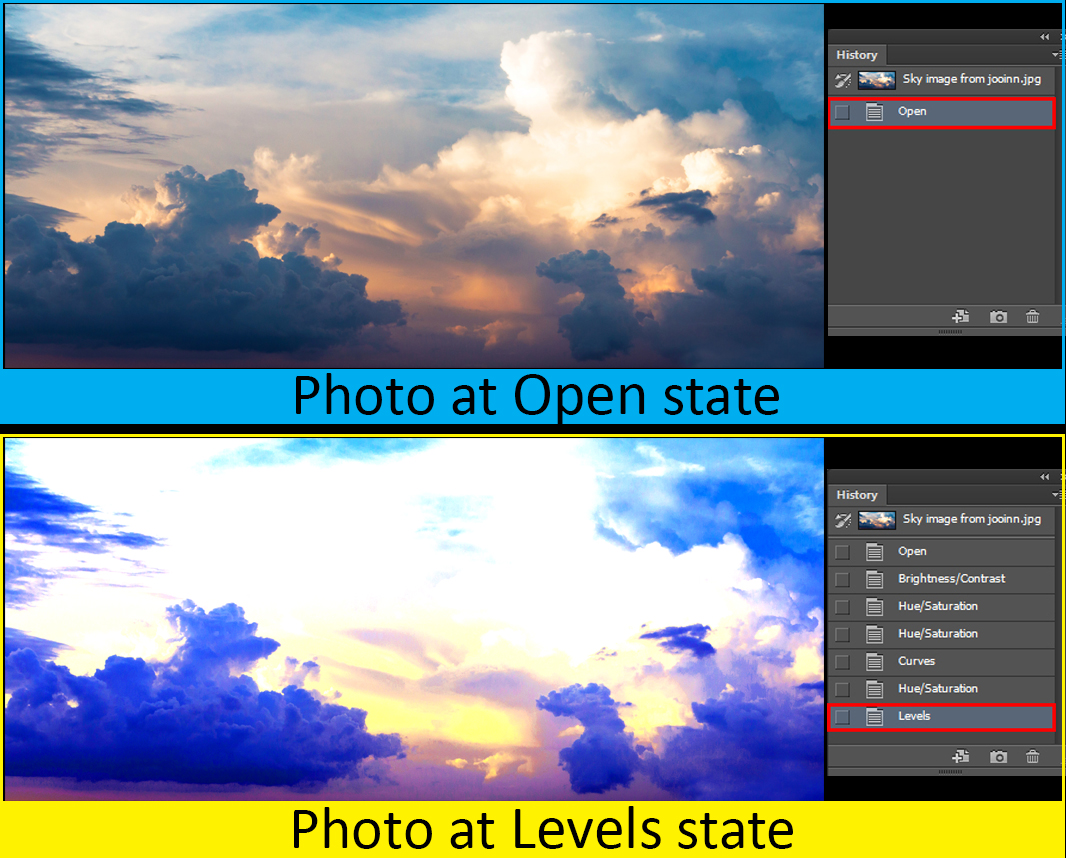
In the above image, I had downloaded a photo and opened it in Photoshop, you can see the first state where the image is completely raw.
I did something like this to the photo
-
Opened the imaged.
-
Increased its contrast.
-
Changed the hue of the Photo.
-
Increased Saturation.
-
Adjusted image with the Curves(Ctrl+M).
-
I am not satisfied with the current saturation, so I again increased it.
-
To make the clouds brighter I tried using Levels(Ctrl+L), But it failed.
At 7th state, after using the Levels, I lost the Dynamic range of the image, so I have to travel back to the previous state(Hue/Saturation State) where the image was somehow good.
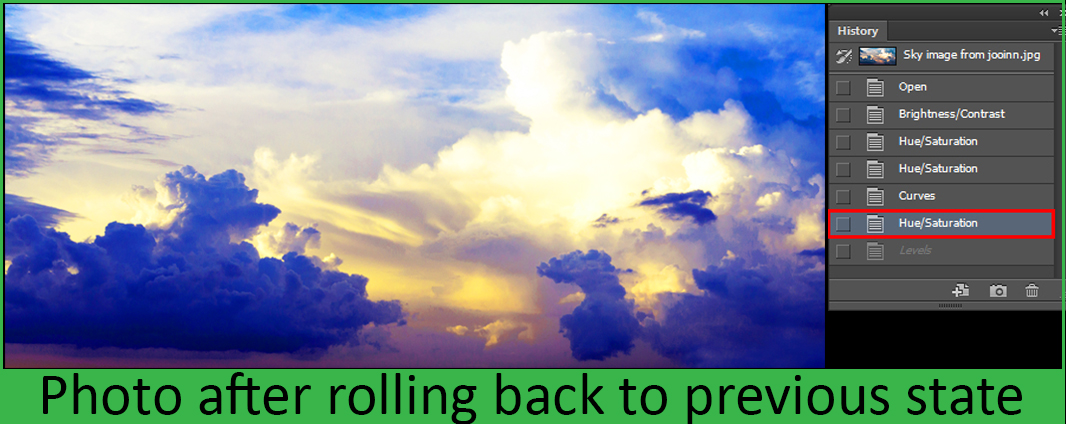
Here it is, I rolled back to the earlier state by clicking on the Hue/Saturation in History Panel/Window. You can also do it by pressing Ctrl+Z, this will take you to the second-last history state. If you press the Ctrl+Z twice, then it won’t take you to the third-last state instead of that will bring back to the current state.
If you want to roll back to the current state to Second-last to Third-last and further, Press Ctrl+Alt+Z.
What I can do with this tool
The above explanation was about History Window/Panel, but what about History Brush Tool?
Let me demonstrate this tool with an Example by increasing the dynamic range of an Image.
If you don’t know what is dynamic range then, let me tell you about it in brief. In common words, the Dynamic Range is capturing more details in Shadows and Highlights.
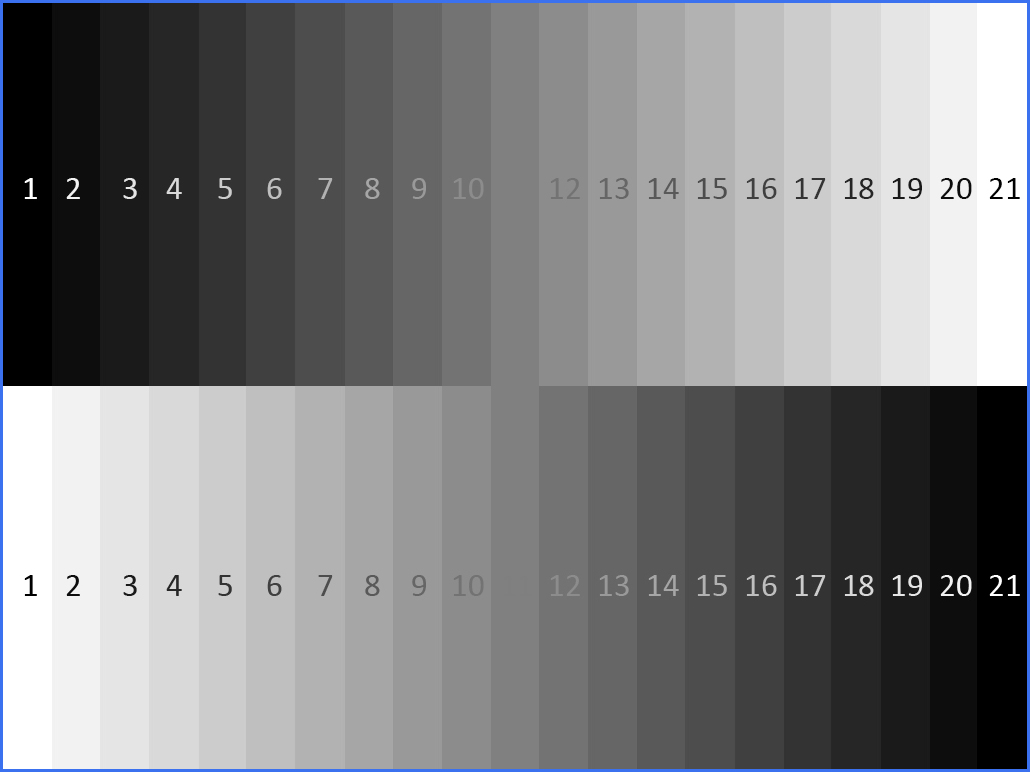
In the above image, there are 21 different shades in grayscale(Black and White), since you are a human being and you can see all the shades, but a camera cannot do the same. If you capture the same footage with your mobile camera it will be quite different.

In image 1, the camera is focusing on the black area, hence which makes the darker tones visible, but at the same time, it also brightens the white shades. You can see it clearly that the brighter shades from 1 to 5 become completely white.
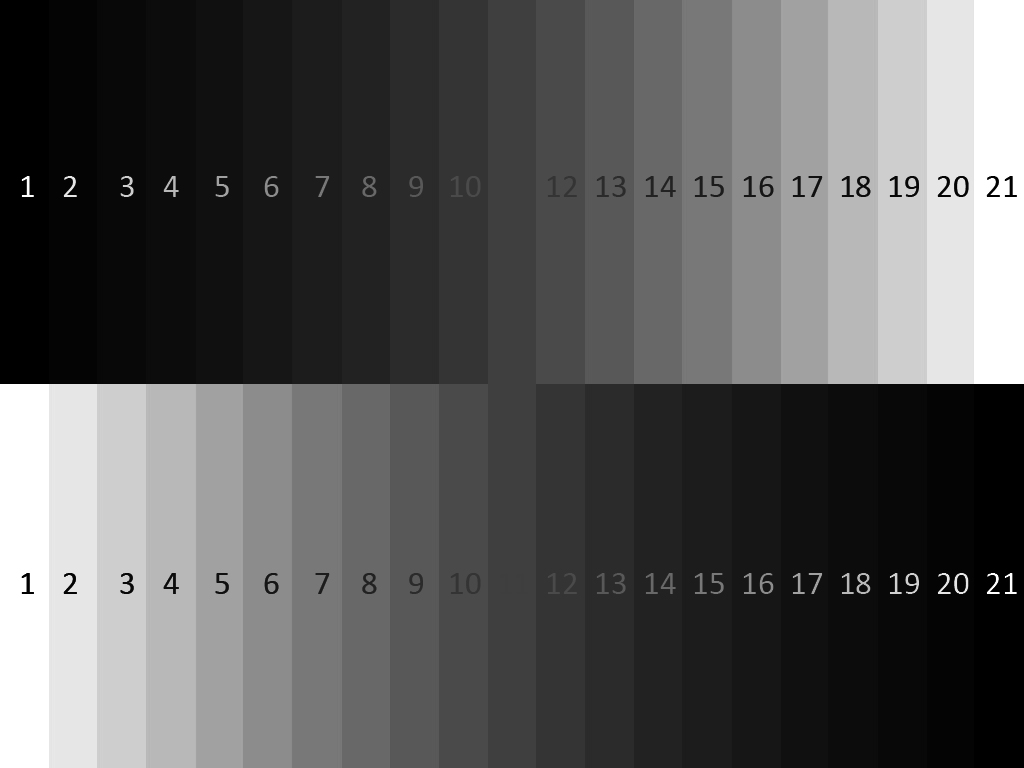
And in image 2, the camera is focusing on the white area, which is making the darker shades 1 to 4 as complete black. But the dynamic range means to capture the darker and brighter tones with visibility. The Dynamic Range will differ depending on lighting conditions.
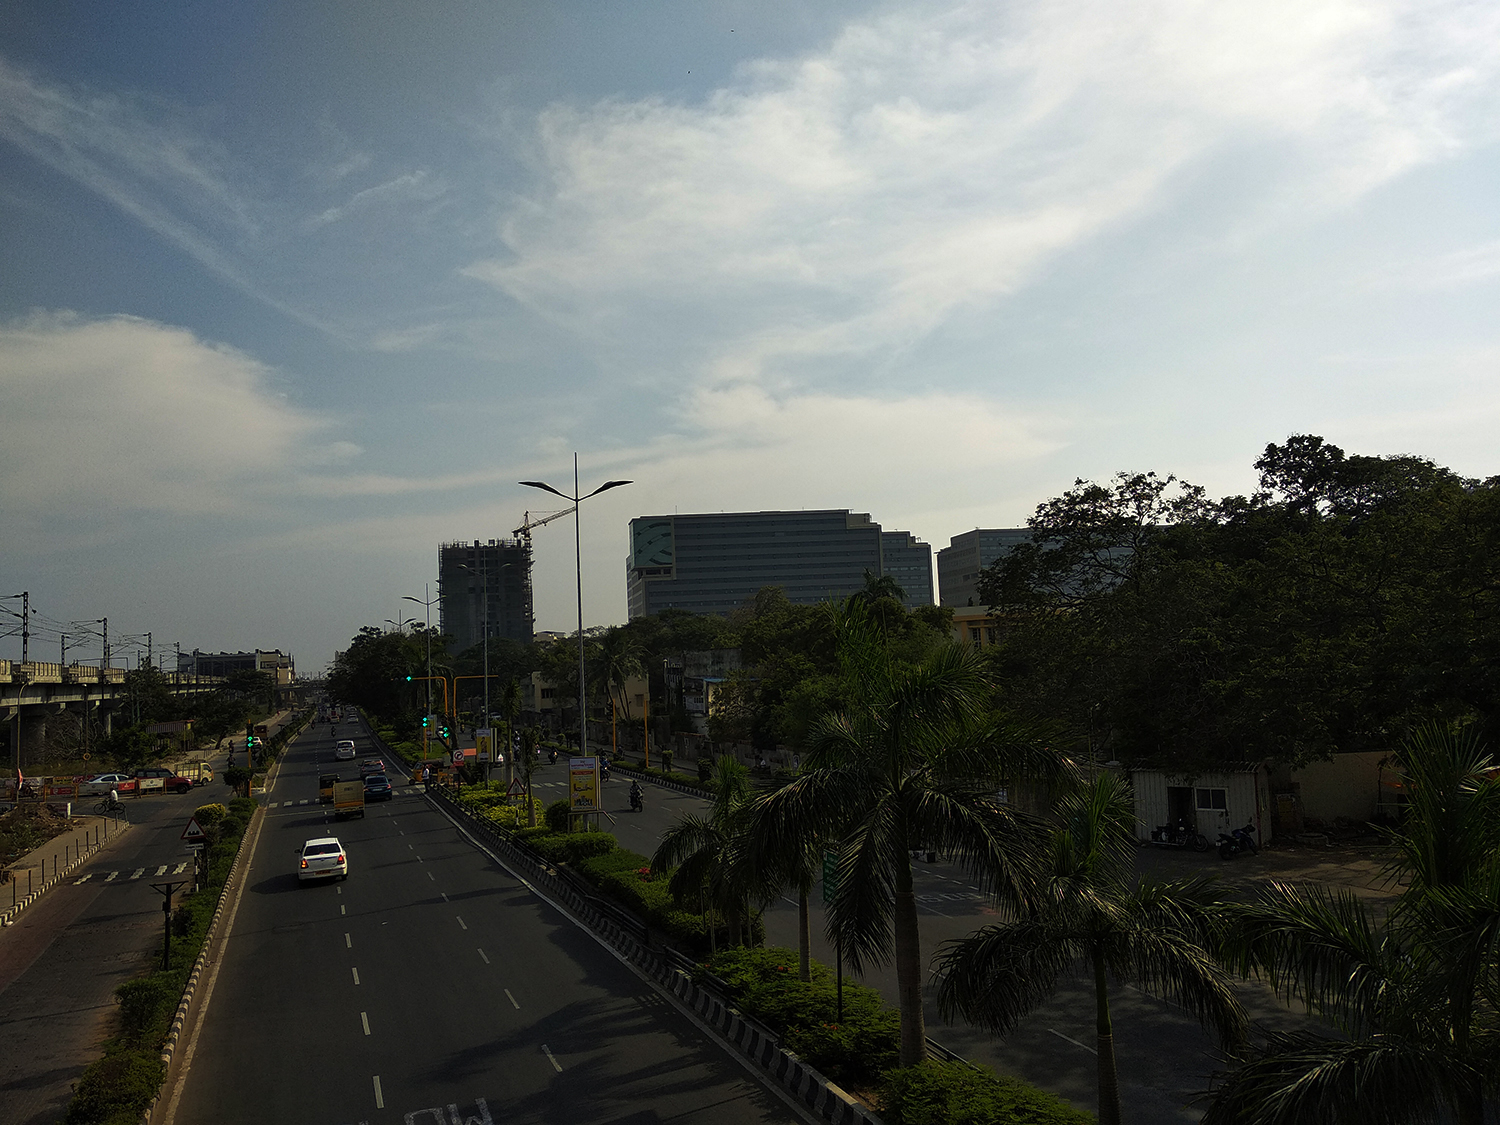
I downloaded this image from fonearena.com, as you can see this image has a very low Dynamic Range while the camera is focusing the sky and simultaneously darken the other area of the image. And we are going to make the Dynamic ranger wider by using the History Brush Tool.
This is how to increase the Dynamic Range of an Image – Using History Brush Tool
Here is the complete guide with Pictures to understand How to increase the Dynamic Range of an image.
First, open the image in Photoshop.
And make the History window appear on your workspace.
Increase the Brightness of the image with Curves, You can open the Curve Adjustment window by Pressing Ctrl+M.
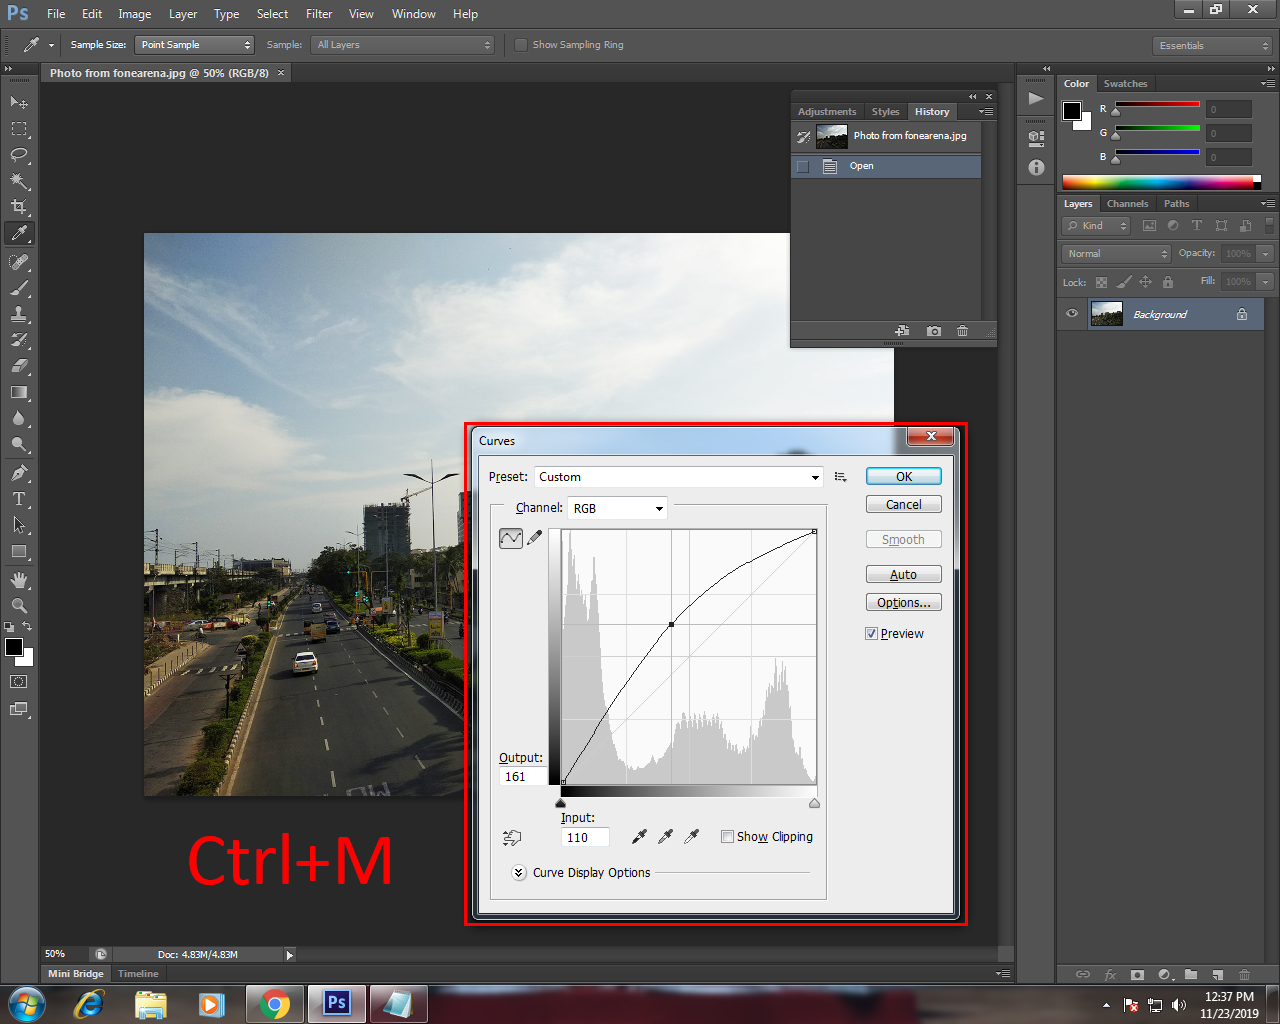
Ok, I increased the brightness of the photo by dragging the mid-tones to the brighter sides in the Curves Windows. See the image below that whose I increased the brightness.
Somehow Photoshop made the darker areas brighter with Curves, But the noticeable thing is, along with the base, it also increased the brightness of the clouds/sky which made the clouds invisible or can also say complete white.
So, to regain the details of the clouds in the image, we use the History Brush tool.
Select the History Brush tool from the Tools Window and its icon looks like the below image or you can also select the tool by Y key on your keyboard.
![]()
On top of photoshop, there will be Options Window in which you can customize the brush.
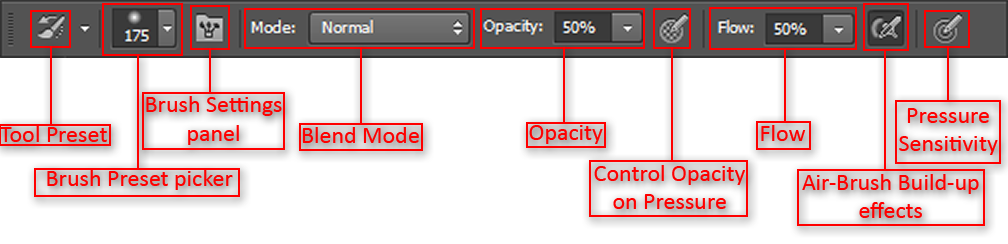
List of Settings
- Tool Preset
- Brush Preset Picker
- Brush Settings Panel
- Blend Mode
- Opacity
- Control Opacity on Pressure
- Flow
- Air-Brush Build-up effects
- Pressure Sensitivity
Tool Preset
Tool Preset is an alternative to Tool Window where you can select any preset tool by clicking on it, but it does a little more than that, such as, Allows you to select any brush with different adjustment preset.
Brush Preset Picker
A drop-down menu appears by clicking on the Brush Preset Picker icon where you can change the brush size and hardness, and can also pick up different brush aswell. You can it also by right-clicking on the image.
Brush Settings Panel
By clicking, on the Brush Setting Panel, it will show an advanced brush setting panel in which where you can fully customize your brush, including, smoothing, Texture, brush pose, and more. The short cut for this window is F5.
Blend Mode
With this blend menu, you can change the blending option and can draw in different blend modes like the color burn, lighten vivid, and others.
Opacity
Opacity means controlling the transparency of the brush, if you are redrawing the pixels of the previous state to the current state, you can control its transparency that how much the previous pixels should be visible on drawing with the brush.
Control Opacity on Pressure
If you are using a tablet to edit with photoshop, and if it has pressure sensitivity then you can control the opacity on pressure. The harder you press – the more visibility will be there, the lighter you press – the more transparency will be there.
Flow
Flow is the control of the amount of ink/data coming out of the brush. The difference between Opacity and flow is, the Opacity controls the transparency, for example, if you draw with the brush by setting the opacity to 25% with black color, the visibility of black color will only be 25%, it doesn’t matter how many times you rub on the layer, it only draws 25%, until you start another stoke. But Flow does the different work, means, once you keep the flow to 25% and if you draw with it, then the first time it will output 25% of ink and if you again rub on it, then it will output 25% of ink.
Air-Brush Build-up effect
Air-Brush Build-up effect is also called an Airbrush-Style Build-up effect. After enabling this option, your brush just acts as an ink pen, this is the best tool for those who don’t have a table to work. You already know that how an ink pen reacts, when you write anything on the paper with an ink pen it will draw a smooth stroke, but if you press and hold it on a paper for a little long time, the ink will start spreading all around the paper. And this tool also works on the same principle, to better understand it, create a new file in photoshop, select the Brush tool, set the opacity to 100% and flow to 50%, and then enable Airbrush-style Build effect. Now If you draw a stroke on a blank layer with the brush tool, by setting 100% opacity and with 50% flow, then it draws a smooth as usual, but after drawing the stroke if you press and hold the mouse, then the color will start spreading all around the layer.
Pressure Sensitivity
Pressure sensitivity is for those who have a tablet, it adjusts the size of the brush on the pressure apply. The harder you press while drawing – the bolder or the increased brush size will be, and the lighter you press – smaller or thinner the brush size be.
The above was the explanation of the options panel, hope you understood it. Now to increase the dynamic range of the image, select the History Brush tool, and set the opacity to 100% and flow to 25%, and select the history state when the details of the clouds are visible and you can select it from History Window.
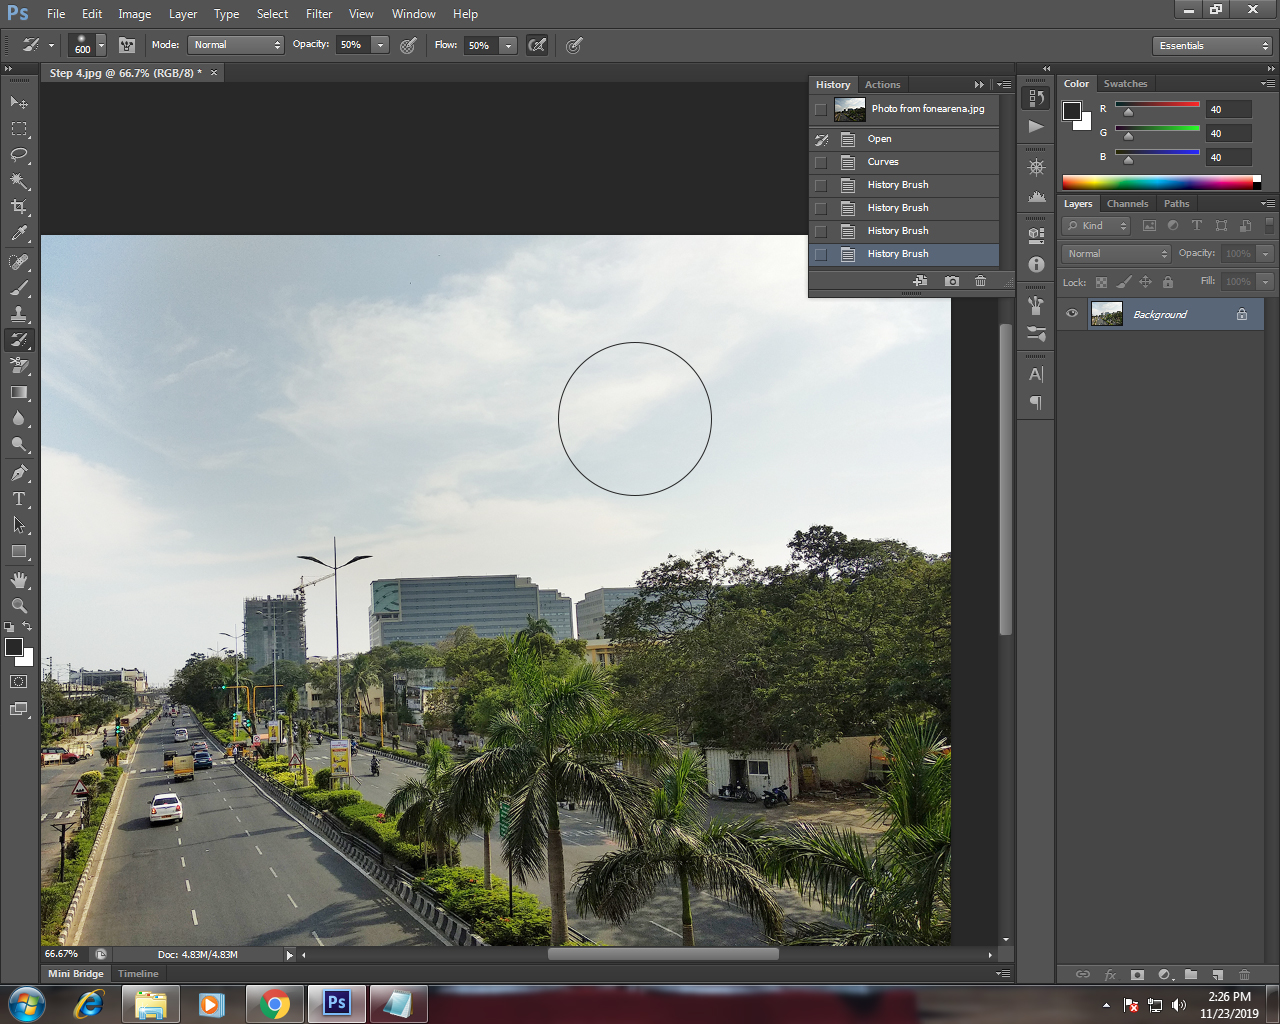
Now I had customized all the settings above, and it’s time to slowly draw on the areas where the clouds become completely white. Refer to the below image, how I am drawing. Do it until you are satisfied with the quality of the photo.
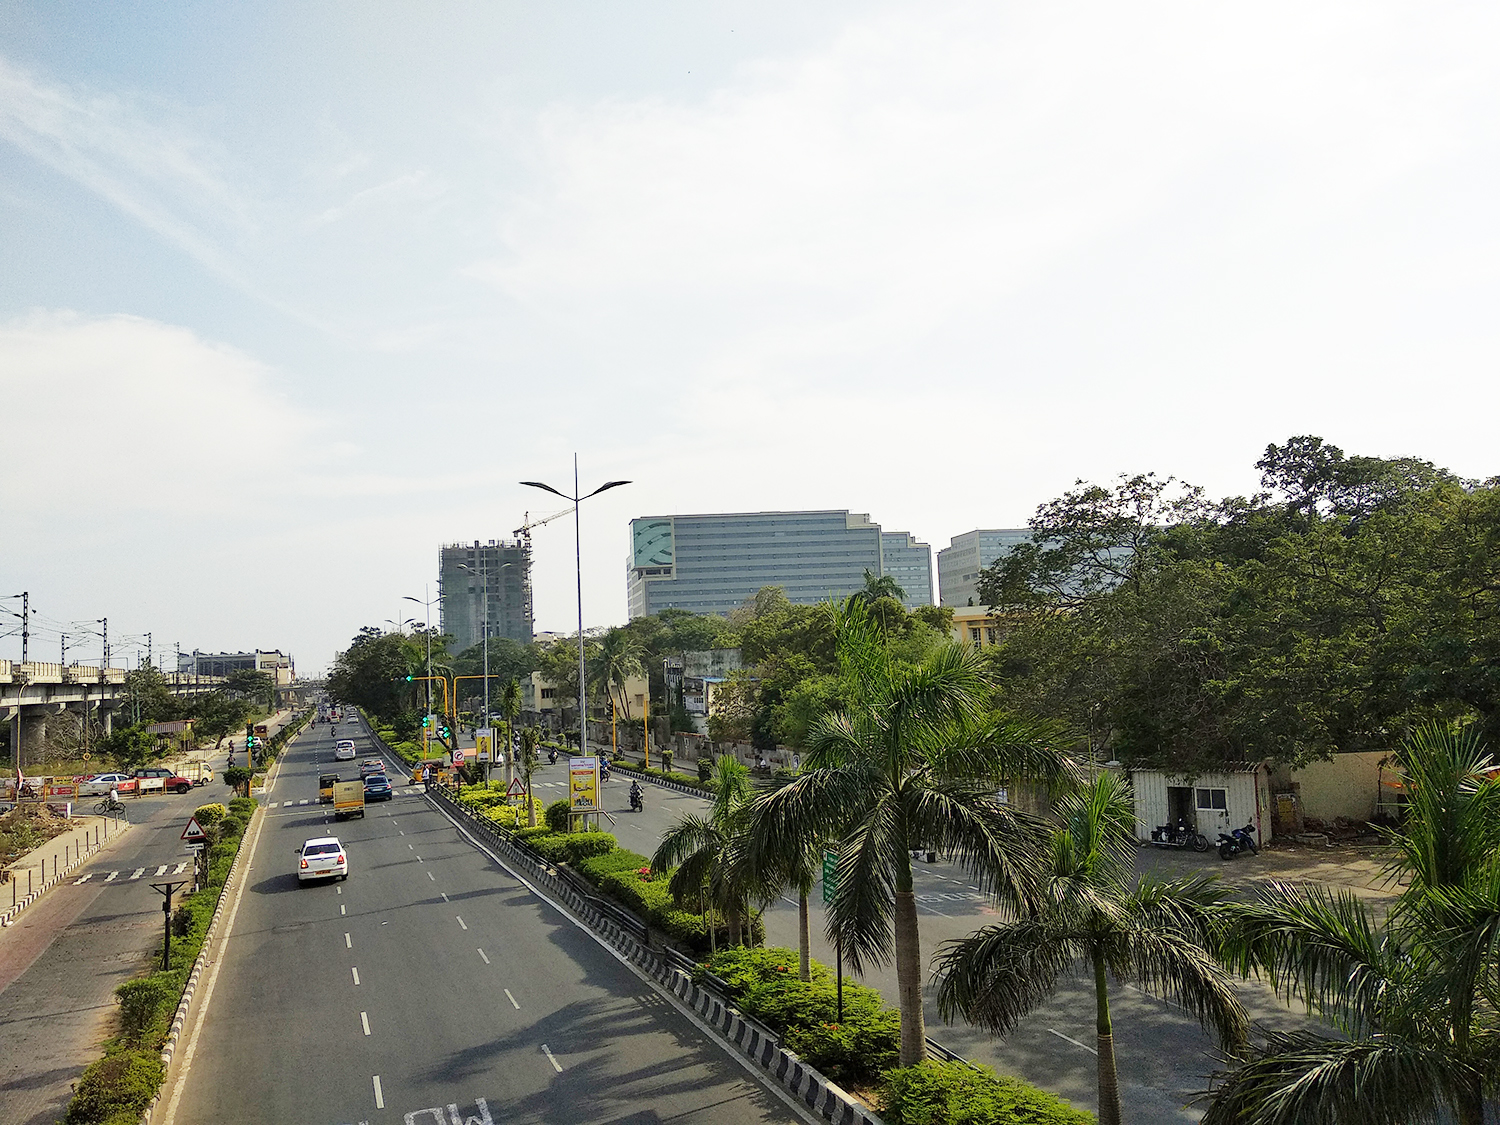
Mine is Done. I made the darker areas as bright and brighter areas as dark, and below is the comparison of before and after. The first one is the raw photo where the camera is focusing on the clouds by darkening the other areas of the image. And I fixed it by using History Brush Tool in photoshop.


If you felt the above explanation going beyond the head, then understand from the below image that actually how the History Brush tool works.
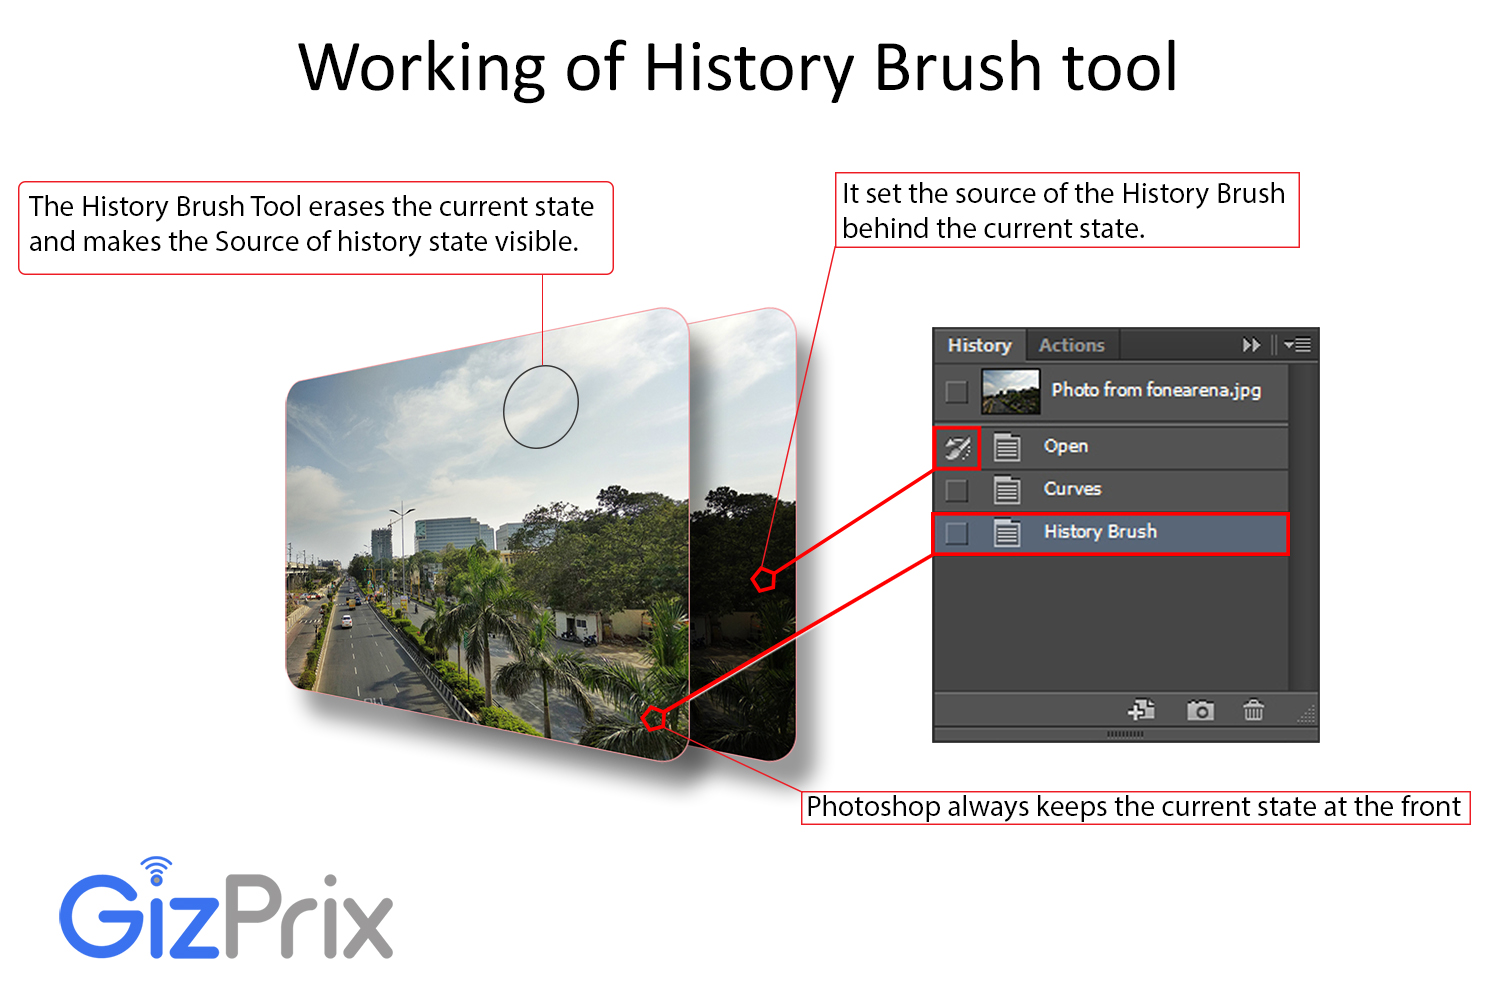
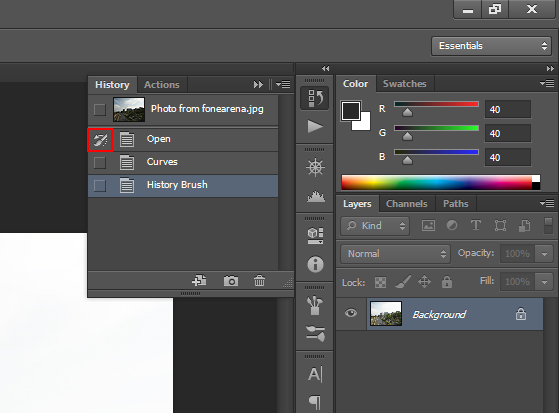
In the image on the right side, the History window is displayed in which the “Source for History Brush” is set on Open state and the History Brush you are seeing below the Curves is the current working state.
What Photoshop does is? it keeps the “Current State” at the front and the “Source State” behind it. On drawing with the brush on the current working state, it erases the pixels of the current layer and makes it transparent so that the Source State‘s pixels appear in the erased areas.
What are the limitations of this tool
You understood how to use the History Brush tool, and that’s not enough, you also have to know its disadvantages.
- You cannot use this tool in different color modes – for example, if you want to retrieve the RGB pixels into the Grayscale then you cannot do that.
- It won’t work after cropping the image – for example, If you are working on an image, and cropped it for some reason and want to recover the previous pixels before cropping, then you cannot do that too.
- It also won’t work after changing the resolution/size of the image by checking in the “Re-sample image”.
- And there are some other drawbacks, which you got to know about after working on it practically.
How to Increase the History States
By default, photoshop set its History State Limit to 20, which means, you can only undo the image 20 times. To increase the History State Limit, Go to Edit -> Preferences -> Performance or you can also use the shortcut Ctrl+K to directly navigate there. And on the right side on the screen, the History States option will be there, with the number 20 written beside it. There you can increase the History states up to 1000. But increasing the History State also has a disadvantage, that is the Scratch Disk Full error. Photoshop uses RAM and other disk drives as well to store the cache files, and if you increase the limit of History State, then it stores more data in RAM and other drivers that cause Scratch Disk Full / Ram Full error.
Is it available in Adobe Photoshop 7.0?
Yes! Adobe Photoshop 7.0 also comes with the History Brush tool.

 released in China")


[…] In Cameras, we get various options to buy. All the cameras are different in terms of features/specifications, and each of them has their own expertise. So many camera manufacturers out there, who are focusing on upgrading their existing models because of high demand. Like if you look at ARRI and RED, they are famous for cinematography and its highest Dynamic Range cameras, and now they are working on achieving even wide dynamic range. […]